
Field manual · 10/17
Field Tools
The wrench button opens the tool kit. Twenty-one tools run on the map you are looking at — so position the map first, then pick a tool. This chapter covers the measurement, capture and output tools; the terrain analysis tools have their own chapter.
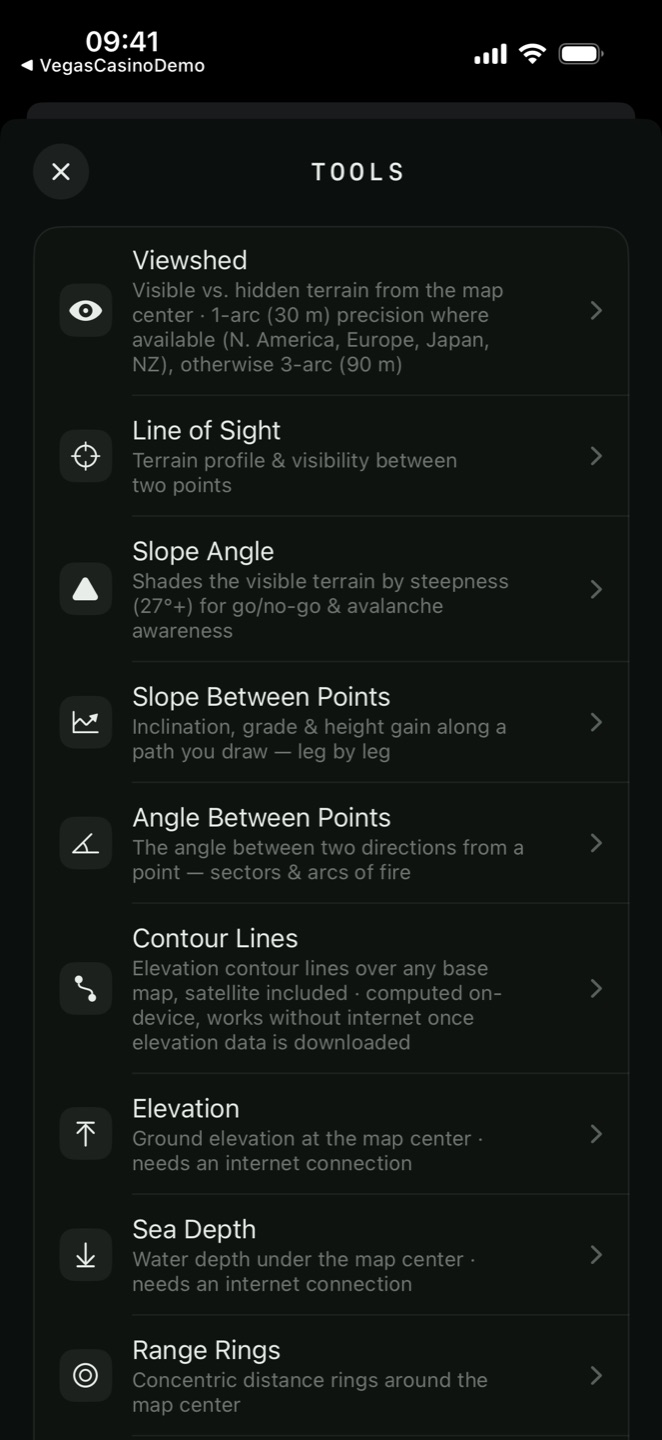
the tools sheet
Every tool in launcher order, with the app's own one-line description:
| Tool | What it does | Tier |
|---|---|---|
| Viewshed | Visible vs. hidden terrain from the map center | 5 km free |
| Line of Sight | Terrain profile & visibility between two points | FREE |
| Slope Angle | Shades the visible terrain by steepness (27°+) | PRO |
| Slope Between Points | Inclination, grade & height gain along a path you draw | PRO |
| Angle Between Points | The angle between two directions from a point | FREE |
| Contour Lines | Elevation contours over any base map, computed on-device | PRO |
| Elevation | Ground elevation at the map center | PRO |
| Sea Depth | Water depth under the map center | PRO |
| Range Rings | Concentric distance rings around the map center | FREE |
| Measure Distance | Live distance along a path | FREE |
| Measure Area | Live area & perimeter | FREE |
| Measure Circle | Live radius & area | FREE |
| Measure Cursor | Live readout from you to the map center as you pan | FREE |
| GPS Photo | Photo stamped with your coordinates | FREE |
| Print Map | Export the map as a PDF sheet at a true scale | PRO |
| Position Averaging | Average GPS fixes over time into a precise pin | PRO |
| Weather Forecast | Forecast at the map center | Today free |
| Sun & Moon | Sunrise, sunset, twilight (BMNT/EENT) & moon phase | FREE |
| Coordinate Converter | Convert between MGRS, UTM and Lat/Lon | FREE |
| Unit Converter | Convert length, speed, angle and temperature units | FREE |
| AR View | Peaks and your own pins through the camera | 1 free run |
the tool dock
Six tools are persistent — Viewshed, Range Rings, Line of Sight, Angle Between Points, Slope Angle and Contour Lines. They keep drawing until you close them, and several can run at once.

Active tool bar
The tool you touched last shows its full controls in a bar just above the tab bar.

Chip stack
Every other running tool collapses to a compact chip with a close button, stacked bottom-left. Tap a chip to promote that tool back to the bar. The stack scrolls when it grows tall.
range rings
Concentric distance rings around the map centre — engagement envelopes, sensor coverage, walking radii, a search pattern.
- Number of Rings
- 1 to 12
- Spacing
- 0.1 km to 10 km, in 0.1 km steps
- Radial bearing lines
- Adds spokes so you can read a bearing off the rings
- Ring Color
- Any colour
measuring distance, area and circles
Three live measurement tools. Tap to lay points; the readout updates as you go.

Measure Distance
Live distance along a path. The summary breaks the path down leg by leg with the distance and azimuth of each segment.

Measure Area
Live area and perimeter of a polygon.

Measure Circle
Live radius and area from a centre and one edge point.
measure cursor
A live readout from your position to the map centre that updates as you pan — nothing is drawn, nothing is saved. Scrub the map around and watch the numbers to the crosshair change, like a range-finder you sweep across the ground.
A gear on the tool opens its Fields, each a toggle:
- Distance
- Ground distance to the crosshair
- Azimuth / Back Azimuth
- Bearing there and back, in your north reference
- Height Difference PRO
- Elevation change to the crosshair
- Slope PRO
- The gradient between you and it
- ETE
- Estimated time to walk there, with an ETE Speed of your current GPS speed or a fixed pace
angle between points
The angle between two directions from a single point — a sector of fire, an observation arc, the spread between two landmarks from where you stand.
Place a vertex and two leg endpoints. The tool reports:
- Vertex
- The corner coordinate, in your chosen format
- Leg A Bearing
- Direction to the first point, in your north reference
- Leg A Length
- Distance to the first point
- Leg B Bearing
- Direction to the second point
- Leg B Length
- Distance to the second point
- Angle
- The included angle, in degrees, mils or gradians
- Reflex
- Switches to the outside angle — the other way round the vertex
gps photo
A photo with the position burned into the image itself — for a report, a damage record, a range card or a sample site, where the coordinates have to survive being emailed as a picture.
- Open Tools → GPS Photo and grant camera access if asked.
- Frame the shot. The stamp shows the live position, altitude and heading.
- Take the photo, then Retake or Save.
position averaging PRO
A single GPS fix is a guess with an error attached. Averaging many fixes taken from the same spot shrinks that error — the app's own advice reads: stand still while averaging. Random GPS error shrinks with the square root of time — a few minutes usually beats any single fix; longer keeps helping.
- Stand on the point. Put the phone down or hold it still.
- Open Tools → Position Averaging and tap Start.
- Watch Samples and Time climb and the scatter tighten. Restart throws the run away and begins again.
- Tap Stop, then Save Pin.
print map PRO
Exports what is on screen as a PDF map sheet at a true scale, with a scale bar, a north arrow and the ground coverage printed in the footer. Print it, fold it, and it works with no battery.
| Field | Choices |
|---|---|
| Sheet Title | Optional free text printed on the sheet |
| Paper | A4 · A3 · Letter · Legal |
| Orientation | Portrait · Landscape |
| Scale | 1:10 000 · 1:25 000 · 1:50 000 · 1:100 000 · 1:250 000, or View |
| Base map | Print the map imagery, or leave it off for a clean overlay sheet |
| Grid overlay | Prints the MGRS, UTM or lat/lon graticule |
| Pins, shapes & tracks | Prints your saved items and recorded tracks |
| Ground coverage | Readout of how much ground the sheet will cover |
converters
Coordinate Converter
Convert between MGRS, UTM and Lat/Lon. Type a coordinate in one system and read it in the others — the same conversion the Search screen's GRID tab performs, on its own screen. Free.
Unit Converter
Length, speed, angle and temperature. The angle conversion covers degrees, US/NATO mils (6400), Soviet mils (6000) and gradians (400) — the one you want when a bearing arrives in the wrong unit. Free.